Why Proper Siding Installation Matters
Siding is your home’s first line of defense against the elements. When siding installation is done incorrectly, small gaps and alignment issues can allow moisture to reach the structure beneath. Over time, this can lead to wood rot, mold growth, and costly repairs that could have been avoided.
The siding installation process also affects energy efficiency. Poorly installed siding can allow air leaks that make your home harder to heat and cool. This puts extra strain on HVAC systems and increases utility costs. Following proper siding installation steps helps create a tighter exterior envelope that supports consistent indoor temperatures.
Beyond protection, siding also affects how your home looks. Crooked lines, uneven seams, and visible fasteners stand out immediately. Taking the time to learn how to install siding the right way ensures a clean, professional appearance that adds value to your property.
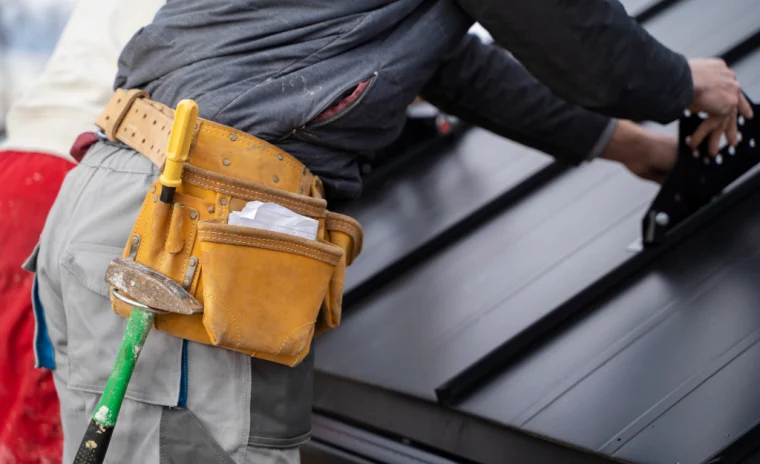
Tools and Materials Needed for Siding Installation
Before beginning any siding installation, having the right tools and materials on hand is critical. Interruptions during installation often lead to mistakes, rushed decisions, or skipped steps that affect the final result.
Basic tools for siding installation include a tape measure, chalk line, level, utility knife, and either a hammer or nail gun. Cutting tools such as a circular saw or siding cutter are also necessary, depending on the siding material being used. A caulking gun is needed for sealing trim and transition areas.
Materials typically include siding panels, starter strips, J-channel, trim pieces, corrosion-resistant fasteners, flashing, and a weather-resistant barrier. Each siding type has its own requirements, so reviewing manufacturer guidelines before starting the siding installation process helps prevent installation errors and material waste.
Step 1: Inspect and Prepare the Exterior Walls
Preparation is one of the most important siding installation steps and is often underestimated. Begin by removing any existing siding if required. Once removed, inspect the sheathing underneath for damage, soft spots, or signs of moisture intrusion. Any compromised materials should be replaced before moving forward.
Next, install a weather-resistant barrier over the sheathing. This layer helps manage moisture and protects the structure if water ever gets behind the siding. Overlapping seams correctly and sealing around openings ensures consistent coverage.
Walls should be flat and even before siding installation begins. Uneven surfaces can cause panels to bow or crack over time. Taking the time to prepare the wall surface properly sets the stage for a smoother and more reliable siding installation process.
Step 2: Measure and Plan the Layout
Accurate measurements are essential when learning how to install siding. Measure each wall carefully, including window and door openings. These measurements determine how much siding material is needed and where seams will fall.
Using a chalk line to establish reference points helps keep siding rows straight as installation progresses. Planning the layout ahead of time also allows you to balance seams and avoid narrow cuts at the top or bottom of walls.
Thoughtful layout planning is a key part of any siding installation guide. It reduces wasted materials, speeds up installation, and improves the finished appearance of the exterior.
Step 3: Install Starter Strips and Flashing
Starter strips form the foundation for the first course of siding. These strips must be installed level, as every siding panel above them depends on that starting point for alignment. Even small errors at this stage can multiply as installation continues upward.
Flashing should be installed around windows, doors, and any wall penetrations. Flashing directs water away from vulnerable areas and helps prevent leaks. Proper flashing is a critical part of the siding installation process and should never be skipped.
Installing starter strips and flashing carefully helps ensure that the siding installation steps that follow remain consistent and secure.
Step 4: Begin the Siding Installation Process
Once preparation and layout are complete, the main siding installation process begins. Start at the bottom of the wall and work upward, locking each panel into the one below it according to manufacturer instructions.
Fasteners should be placed correctly and not driven too tightly. Siding materials expand and contract with temperature changes, and panels need room to move. Over-tightening fasteners is a common mistake that leads to buckling or cracking.
Throughout installation, regularly check alignment with a level. Maintaining straight rows is a core principle of how to install siding correctly and helps achieve a uniform, professional look.
Installing Different Types of Siding
Different siding materials require different installation techniques. Understanding these differences is essential for a successful outcome.
Vinyl siding installation requires careful attention to expansion gaps and fastening placement. Panels should move freely once installed, and cuts should allow room for temperature changes.
Fiber cement siding installation involves heavier materials and specialized cutting tools. Proper spacing and edge sealing are important to prevent moisture absorption and cracking.
Wood siding installation requires sealing all sides of the material before installation. Spacing between boards must be consistent to allow for natural expansion and contraction. Each siding type follows the same basic siding installation steps but applies them in slightly different ways.
Step 5: Cut and Fit Around Openings
Cutting siding to fit around windows and doors requires precision and patience. Trim components such as J-channel help direct water away from openings while creating clean transitions between siding and trim.
Measurements should be double-checked before cutting. Panels should fit snugly without being forced into place. Tight fits can restrict movement and lead to damage over time.
This stage of the siding installation process plays a major role in long-term water control and overall appearance.
Step 6: Install Trim and Finishing Pieces
Trim pieces protect exposed edges and complete the siding installation. Corner posts, fascia trim, and soffit connections should be installed according to manufacturer guidelines.
Caulking should be applied where appropriate, especially at joints and transitions. However, siding should not rely solely on caulk for water management. Proper installation techniques allow siding to shed water naturally.
Finishing details often separate a rushed job from a properly executed siding installation.
Siding Installation Tips for Long-Lasting Results
Following proven siding installation tips helps extend the lifespan of your exterior. Work steadily rather than rushing, and stop installation during extreme weather conditions. Siding should be stored flat and protected before installation begins.
Always follow manufacturer instructions for fastening, spacing, and cutting. These guidelines are developed to support durability and performance.
Paying attention to detail throughout the siding installation process helps avoid repairs and ensures consistent results.
Common Siding Installation Mistakes to Avoid
Many siding problems stem from avoidable errors. Over-driving fasteners restricts panel movement and causes warping. Skipping flashing around openings allows moisture to reach the structure behind the siding.
Poor measurements lead to uneven seams and wasted materials. Ignoring wall preparation allows existing damage to worsen after siding installation is complete.
Understanding these issues reinforces why learning how to install siding properly is so important.
When DIY Siding Installation Makes Sense
DIY siding installation may be appropriate for smaller projects with simple wall layouts. Vinyl siding systems are often more forgiving for homeowners with the right tools and preparation.
However, DIY projects require time, attention to detail, and a clear understanding of the siding installation steps. Mistakes can be expensive to correct later.
When Professional Siding Installation Is the Better Choice
More complex projects often benefit from professional siding installation. Multi-story homes, fiber cement materials, and detailed layouts require experience and coordination.
Professional installation also helps identify underlying issues such as moisture damage or structural concerns before siding is installed.
Knowing when to seek professional help is part of making informed decisions about your home.
Final Thoughts on How to Install Siding
Understanding how to install siding gives homeowners confidence and clarity. This guide covered the full siding installation process, from preparation and layout to finishing details and long-term care.
Whether you plan to install siding yourself or hire a crew, knowing proper siding installation steps helps you recognize quality work and avoid costly mistakes. When siding is installed correctly, it protects your home, improves appearance, and supports long-term durability.
How We Can Help
At Cobble Construction Group, we install and repair siding as part of a full exterior approach that focuses on reliable workmanship and organized project management. We bring clear communication, consistent scheduling, and dependable results to every job we take on. Homeowners across Huntersville, NC and the surrounding Charlotte area trust us because we do what we say we will do and stand behind our work. If you are planning a siding project or dealing with exterior damage, our team is ready to help you move forward with confidence.